New Series
1B MicroScript is a computer language that's a little different, being aimed at easily realizing an electric picture-story show on the screen, and easily controlling home appliances and various equipment. It is a language that corresponds, so to speak, to a screenplay, and, in accordance with this, things on the screen and actual equipment types perform as actors. Because there were a lot of calls from everyone for an easy introduction to MicroScript, we are addressing that here.
1B MicroScript [1] is application software for doing presentations and controlling external equipment. The software mechanism is simple, and one can easily begin using it in realizing simple presentations. On the other hand, functions also are in abundance, and thus it is sufficiently compatible even with high level applications.
In this series, I would like to explain in as easy a manner as possible the methods for using 1B MicroScript.
Presentations
1B MicroScript can change window screens one after the other in the manner of a picture-story show. If you give instructions beforehand, displaying pictures inside these, erasing them, and moving them is also freely done. Contrivances such as creating a button that when clicked launches some other operation can also be embedded inside windows.
1B MicroScript is the most suitable tool for creating presentations. The user can operate it by directly touching the presentation. It will serve as a powerful weapon in fields where appealing to the visual is effective, such as information systems and manuals.
Control of Home Appliances
Being able to easily control external devices is also one of 1B MicroScript's features. That which becomes the object of control are home appliances and AV equipment that can be operated with an infrared remote control. Televisions and video players, it goes without saying, and recently there are a lot of devices that can be operated with an infrared remote control, such air conditioners, lighting, and curtains. 1B MicroScript freely controls devices of those types by connecting to a learning remote control [2]. For example, 1B MicroScript can be used for development even in applications of the type where when it becomes morning, with a one-touch operation you open the curtains, turn on the television, . . .
Moreover, controlling video equipment compatible with the VISCA standard [3] is also possible. Dubbing work while editing tape taken with a video camera is troubling work on occasion. At a time such as this, by using 1B MicroScript, you can even make a simple video editing machine for your own special use.
Command Language
When we look at it from a different aspect, 1B MicroScript is a command language. It is provided with functions for such things as macro definition, numerical operation, condition decision, recursion, procedures, and variables (four types: local, global, shared, and saved). Furthermore, event driven procedures and multitask descriptions also are possible. These are indispensable when constructing graphical user interfaces. In 1B MicroScript, we have loaded abundant functions on top of a carefully selected simple mechanism. For these reasons, as a language, 1B MicroScript has depth. As soon as you acquire a command of it, you will be able to apply it to many uses [4].
When we look at it in this manner, we become aware of the fact that 1B MicroScript is of a slightly different disposition than traditional personal computer software, such as word processors, spreadsheets, and databases. Through trial and error, one moves pictures and controls external devices as he/she is imagining in his/her head. It's without a doubt that there are also many users who feel the joy of doing things for themselves.
In No. 1 of this series, I will explain the basic mechanisms of 1B MicroScript. Even with just the details on this occasion, you should be able to create quite effective presentations. As for applications such as controlling home appliances and video equipment, I will take those up from the next occasion.
What we call a "script" in 1B MicroScript means a "screenplay." A screenplay is something in which a writer has written down the progression of a play. In 1B MicroScript, doing things in the manner of writing a screenplay, we describe a script and create a play that progresses onward inside a window.
In the same manner as a screenplay, we write out in order the things we would like to do in the script also. An example would be a state of this nature.
APPEAR Flower WAIT 1000 MOVE Flower 10 20
The things that appear in [blue upper case] English letters, such as APPEAR, WAIT, and MOVE, are instructions that we send to 1B MicroScript. When we write the meaning of the above three script lines in Japanese, it becomes like this.
Make Flower appear Wait 1,000 milliseconds (= 1 second) Move that Flower 10 right 20 down
Those who appear in plays are actors. Accordingly, in 1B MicroScript also, we call the things that appear in windows "actors," without any change in meaning. In the manner of the example of the flower at the very top, there are also cases that actually correspond to props.
It is not described here, but it is also necessary to set a stage (background) in which the flower will appear. In 1B MicroScript, this also is called a "stage," with the same meaning.
Work in which 1B MicroScript is used is divided in two.
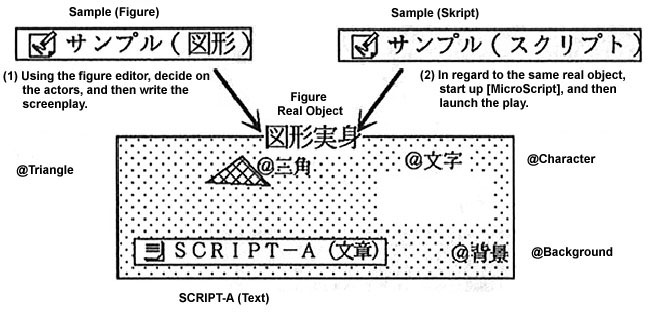
1B MicroScript is an application that in fact carries out only 2. We create the stage and actors using the figure editor. We write the script using the text editor.
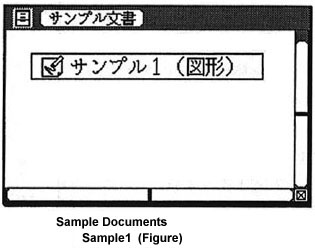
The datum that become the center of the play is a real object we create with the figure editor. This real object we open with the "Basic Figure Editor" application, and then we edit the stage and actors. We open the same real object with the "MicroScript" application, and then we execute it. For this reason, two execution function tags [5], "Basic Figure Editor" and "MicroScript," are embedded in the figure real object (Fig.1).
 |
|
|
On this occasion, try creating a simple play which progresses in the order of 1 through 4 below.
 |
 |
|
|
|
 |
 |
|
|
|
 |
 |
|
|
Furthermore, in Fig. 7, there are responses to the following click operations.
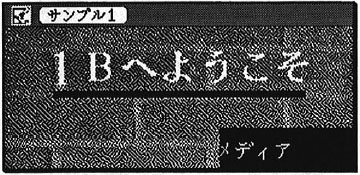
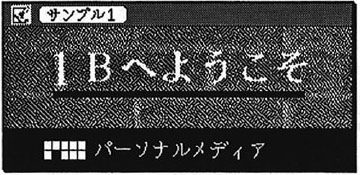
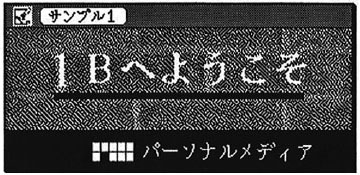
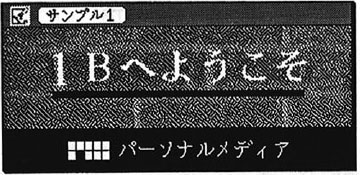
(a) When the brick part is clicked, there is one more repetition of 1 through 4 (b) When the black background part is clicked, the company name "Personal Media" sways left and right only one time and then returns to its original position (Figs. 8~10).
 |
 |
|
|
|
 |
|
|
|
Let's actually try creating a play with MicroScript. First, things begin from the underlying preparations of the creation.
- 1 Take out a template
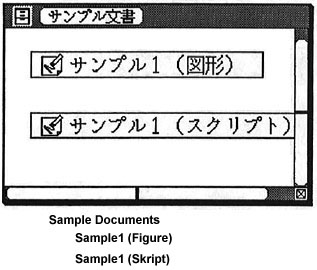
Select [Template List] from the [Utility] menu. The "Template List" window will appear. As a template called "Script Pad (Figure)" has been entered inside that, drag that to another window. Here, attach the title "Sanpuru1" [Sample1, used hereafter] (Fig. 11).
Figure 11
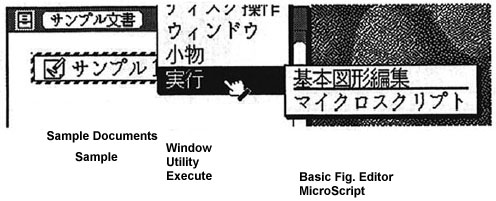
- 2 Confirm the inside of the [Execute] menu
The virtual object "Sample1 (Figure)," at a glance, seems like simple figure data. Accordingly, let's click on "Sample1 (Figure)" and take a look at the contents of the [Execute] menu. Although we call it a script form, in actuality, it is only an execution function tag called "MicroScript" embedded in a figure real object (Fig. 12). As mentioned previously, here is the point of creating a play based on 1B MicroScript.
Figure 12
- 3 Open the figure editor
- 4 Make the text real object "SCRIPT" the screenplay
We will now go on to create the stage and actors in this window. Prior to that, let's make the preparations for the screenplay. As you expected, from inside the "Template List" window, this time we drag a "Text Pad" template into this window. At this time, it is necessary that the name of this real object begins with "SCRIPT." A text real object in which the name begins with "SCRIPT" is recognized as a screenplay. Here, let's put it down as "SCRIPT: Sample1" (Fig. 13).
Figure 13
- 5 Adjust the text editor format
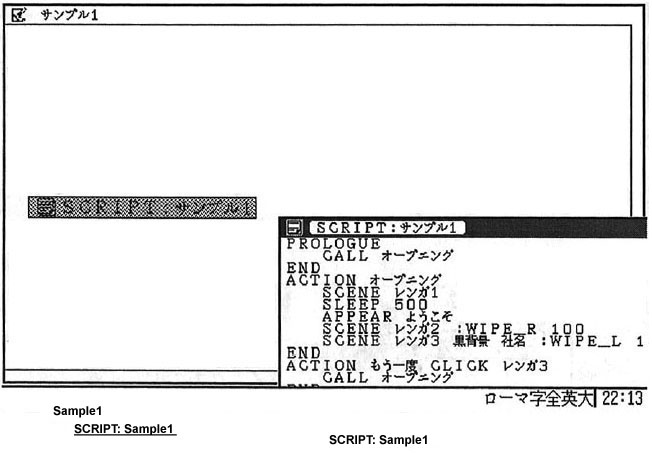
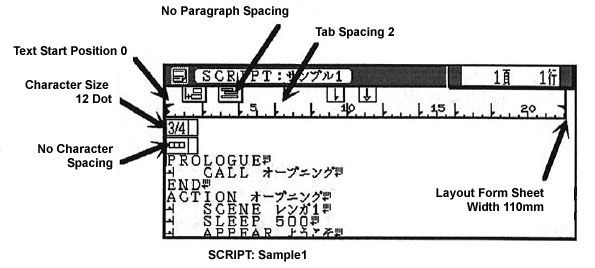
Open "SCRIPT: Sample1" and make preparations for writing the screenplay. At this time, if you set the size of the text editor window to about that in Fig. 14, it will be easy to use. The window title and scroll bar width are made narrower than the standard. Also, I have set the format of the text editor in the manner of Fig. 15. By doing things in this manner, conditions will be better, even by a little, for having it so that a lot of data can be looked over at a glance.
Figure 14
Figure 15. Modifying the Basic Text Editor standard settings for use with MicroScript
With this, the underlying preparations are finished. Next, we will decide on the stage and actors, and then we will set into the work of writing the screenplay.
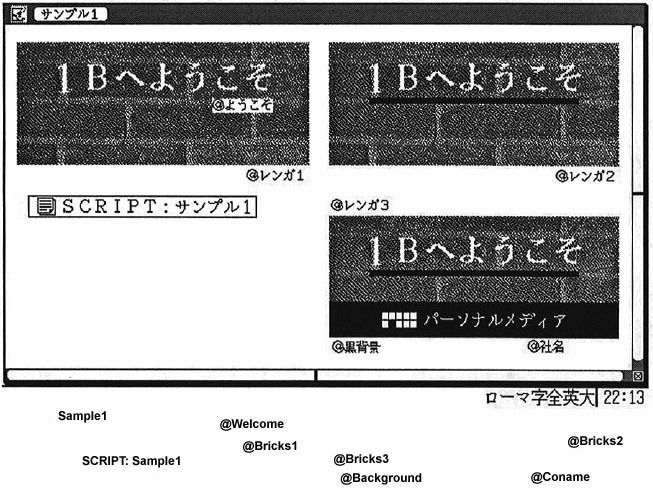
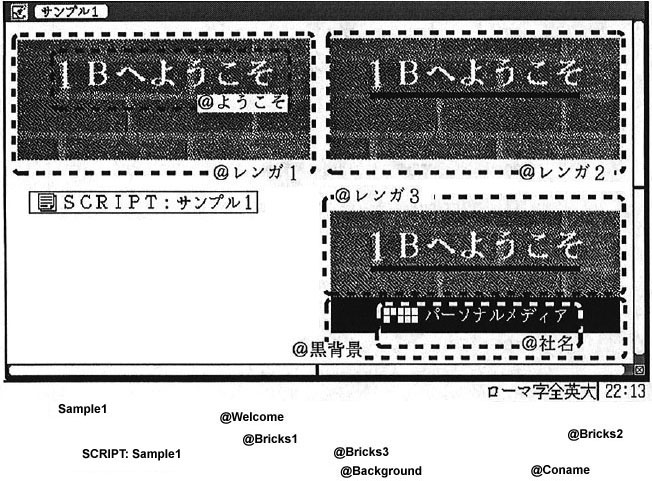
The play we will create on this occasion is a simple one. Accordingly, let's first have you take a look at the completed stage and actors in their entirety (Fig. 16).
 |
|
|
Creating the Figures and Attaching Names
The basis of creating the actors is drawing the figures you want to make appear and attaching names to them. In concrete terms, you write the name in a text frame, and then you make them into a group with a figure. At this time, the first character inside the text frame must be "@."
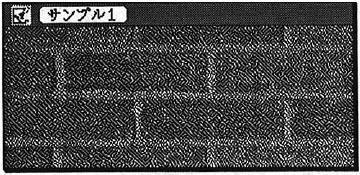
For example, in the upper left of Fig. 16, there is a picture of a brick wall and a text frame called "@Renga1" [Bricks1, used hereafter] and these two are grouped together. By means of this, it comes about that the name "Bricks1" has become attached to the picture of this wall. We call the stage and the figures that serve the role as actors "segments." We call the part with "@" omitted inside the text frame the "segment name."
How many segments have been entered inside Fig. 16? There, in order to make it easy to understand, I have tried surrounding the segments with a dotted line (Fig. 17). The segment "Welcome" is merely mounted on top of the segment "Bricks1." and it is a completely separate segment. The relationship between "Shamei" [company name, abbreviated as Coname and used hereafter] and "Kurohaikei" [black background, abbreviated as Background and used hereafter] is the same.
 |
|
|
Creating Segments Matched to the Scene
In making the play progress, all you have to do is create one after the other the segments you wish to display.
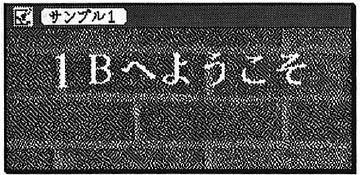
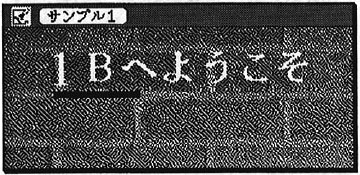
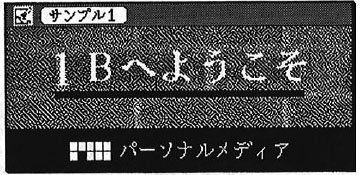
That which corresponds to Fig. 2 is the segment "Bricks1." That which corresponds to the characters that say "Welcome to 1B" is the segment "Welcome." That which corresponds to Fig. 5 is the segment "Bricks2." Fig. 7 has turned into something in which the segments "Bricks3," "Background," and "Coname" have been combined.
Next is screenplay creation for the purpose of making the stage and the actors move. We make the play progress by combining segments made with the figure editor. Hereafter, I shall call the screenplay the "script."
Open "SCRIPT: Sample1," and write the script in here.
The Entire Script
In Fig. 18, [TN1] I have inserted the entire script, and I shall now go on to explain it one item at a time. I have attached line numbers so that it is easy to explain, but actually it is not necessary to input these numbers (Fig. 14).
 |
01: PROLOGUE 02: CALL Opening 03: END 04: ACTION Opening 05: SCENE Bricks1 06: SLEEP 500 07: APPEAR Welcome 08: SCENE Bricks2 :WIPE_R 100 09: SCENE Bricks3 Background Coname :WIPE_L 100 10: END 11: ACTION Oncemore CLICK Background 12: CALL Opening 13: END 14: ACTION Sway Coname CLICK Background 15: MOVE Coname :-20 0 #Sway Coname leftright once 16: MOVE Coname : 40 0 17: MOVE Coname :-20 0 18: END |
|
|
|
In the places that form a space between one word and another, one or more spaces or tabs have to be entered [TN 2]. For example, the space between "CALL" and "Opening" on the second line applies to this. Conversely, it doesn't matter even if several extra spaces have been entered.
A script ignores the characters following "#." This can be used when writing in small memos. The fifteenth line is an example of this.
Japanese for the Names You Attach
Inside a script, the things that are made up of [blue upper case] English letters are the parts that indicate operations to MicroScript. There are occasions when they are called "reserved words," and so on. Also, when indicating them individually, we use the word "statement," as in the "PROLOGUE statement" or the "ACTION statement."
Conversely, the things written in Japanese [black] are names that you decide when you write the script. Of course, it's all right if you don't make them Japanese. It's fine even if you write "Renga" [in the Latin script] in place of "Renga" [in Japanese katakana]. However, for the names that you attach, I would like to recommend by all means that you express them with Japanese. Reserved words and parts that are not so can be distinguished at a glance, and thus ease of reading will increase markedly.
First, between PROLOGUE and END Is Initially Executed
MicroScript first initially executes the places enclosed with the PROLOGUE statement [TN3] and END statement. Here, the contents of that is just "CALL Opening." By means of this CALL statement, we call the "Opening" procedure, and then we go on to execute the substance of that in order from the top. The substance of the "Opening" procedure is in the fourth to the tenth lines. The procedure is a collection of statements enclosed by the ACTION statement and the END statement.
Between the PROLOGUE statement and END statement and the ACTION statement and the END statement, there is indentation of several characters. This does not affect the operation of the script, but when you lay things down in this manner, it is easy to grasp the structure of the entire script at a glance. This also is a method of writing that I would like to recommend.
Display the Scene using the SCENE Statement and the APPEAR Statement
"SCENE Bricks1" (Fifth Line)
The scene changes from Fig. 2 to Fig. 7 are described with the "Opening" procedure. Because the PROLOGUE statement to END statement just call up this procedure, in actuality, the statement by which this is started up and is initially executed is "SCENE Bricks1."
The SCENE statement performs actions that pack specified segments in the upper left and display them. In other words, by means of this statement, Fig. 2 is obtained. Because it will be packed in the upper left, it is all right to put the segment "Bricks1" anywhere in the figure editor window for future use.
"SLEEP 500" (Sixth Line)
Next, "SLEEP 500" will be executed. The SLEEP statement waits only for a specified time. We specify that in units of milliseconds. In this case, the operation of the script will stop for an interval of 500 milliseconds, in other words, 0.5 second. When that elapses, the script will come to move to the execution of the next, or seventh, line.
"APPEAR Welcome" (Seventh Line)
The seventh line will execute "APPEAR Welcome." The APPEAR statement displays a specified segment in that location. By this, Fig. 3 will be obtained.
"SCENE Bricks2 :WIPE_R 100" (Eighth Line)
The changes that move from Fig. 3 through Fig. 4 and onto Fig. 5 are described with just one statement, "SCENE Bricks2 :WIPE_R 100." It uses the same SCENE statement as the fifth line, but the special specification ":WIPE_R 100" is attached. This is the specification for a display effect (effect).
The SCENE statement completely erases all the segments displayed up to that point, and then displays a new screen. At this time, it is possible to specify display effects when moving from the previous screen to the next screen. "WIPE_R" shows moving to the next screen from the left to the right direction, doing it in the manner of turning paper and showing the paper that lies below. The specification "100" shows the number of steps taken to change that scene. The larger the number, the more time taken as the scene slowly moves.
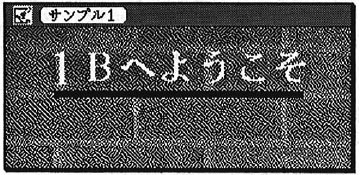
When we look at the appearance of moving through Fig. 4 and onto Fig. 5, it looks as though we are executing a statement to draw an underline. However, in actuality, it is not so. The difference between Fig. 3 and Fig, 5 is just the presence or absence of an underline. Accordingly, we prepare two segments that are different just there, and then by means of display effects we show them as if we are drawing a line. This is a simple method, but it is easy to understand.
"SCENE Bricks3 Background Coname :WIPE_L 100" (Ninth Line)
The changes from Fig. 5 to Fig. 7 are described with "SCENE Bricks3 Background Coname :WIPE_L 100." This is almost the same as the eighth line. What becomes the target is something that combines the three segments Bricks3 Background Coname. With ":WIPE_L," the screen moves on in the manner of being turned from right to left, the opposite of ":WIPE_R."
With this, the processing of the procedure "Opening" has completely finished. The script returns to the second line that called up this procedure. And then, it will come about that the execution of the PROLOGUE statement to the END statement will completely terminate.
After the execution of the PROLOGUE statement to END statement, from the MicroScript side, there won't be an attempt to execute any other statement. As for script execution following that, the operation of the user becomes the impetus.
In the eleventh to the eighteenth lines, procedures are described in which two types of operations from the user serve as impetuses. The description of the procedure "Oncemore" in the eleventh to thirteenth lines is similar to the one in the fourth to tenth lines. What's different is the fact that there is the specification "CLICK Bricks3" at the back of the eleventh line. When we express in Japanese the method by which this procedure started up, it becomes like this. "if the segment 'Bricks3' is clicked, start up the procedure 'Oncemore'."
The procedure "Opening" is started up by means of the procedure called "CALL Opening." On the other hand, the procedure "Oncemore" is started up through the user "clicking on the segment 'Bricks3'."
One point at the time of writing a script lies here. In other words, directly specify the segment you want to react to the operation of a user, and describe the action when that operation occurs. In constructing a graphical user interface, this method of description is essential.
Procedure "Oncemore" (Eleventh to Thirteenth Lines)
The procedure "Oncemore" starts up the procedure "Opening" inside of it. In other words, it repeats from Fig. 2 to Fig 7 one more time.
Procedure "Sway Coname" (Fourteenth to Eighteenth Lines)
The procedure "Sway Coname" first makes the segment "Personal Media" move 20 dots to the left. Next, it makes it move 40 dots to the right from there. Finally, it makes it makes it move 20 dots to the left from there, which returns it to its original position. In other words, it comes about that it compels an action that sways the segment left and right one time.
The MOVE statement only moves the specified segment a specified amount. If you write ":20 30," you will move the segment to a location where it has moved 20 dots to the right and 30 dots down (relative specification). When you would like to move it left or up, all you have to do is use a negative value.
1 Make It So that There Are No Gaps in the Window
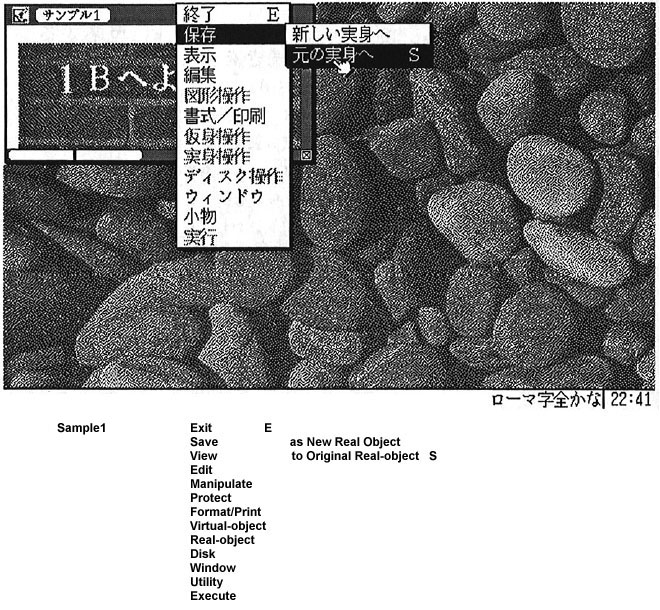
With the work up to this point, the creation of the stage, actors, and script has finished. Let's finally try putting on the play by executing MicroScript. At this point in time, I think the "Sample1" figure editor window and the "SCRIPT: Sample1" window are open, making it so that there are no gaps in this window will make circumstances better when making corrections later. In whichever window, select [to the Original Real-object] from the [Save] menu and save the window contents in the real object.
2 Create a Virtual Object in Which MicroScript Has Become the Standard Application
As for the virtual object "Sample1 (Figure)" in Fig. 11, its standard application is made up as the figure editor. Accordingly, reproduce this virtual object. By this, two virtual objects pointing to the same real object have been made.
3 Start Up MicroScript from the Menu
Select the newly created virtual object and then [MicroScript] from the [Execute] menu and open a MicroScript window.
If you execute [MicroScript] once, the standard application of that virtual object switches to [Micro Script]. The virtual object display also changes to "Sample1 (Skript)" (Fig. 19) [TN 4]. From the next time, you can start up MicroScript with a double click operation.
 |
|
|
4 Adjust the Size and Location of the Window
The size and location of the MicroScript window "Sample1 (Skript)" is the size and location of the window when you closed that real object with the figure editor.
In the play on this occasion, it is necessary to make the window size small. Accordingly, return to the window "Sample1 (Figure)" and appropriately decide the size and location of the window. Then, close the window (Fig. 20). Open once again the virtual object "Sample1 (Skript)" and confirm the size and location. Repeat this operation several times and make it the appropriate size and location.
 |
|
|
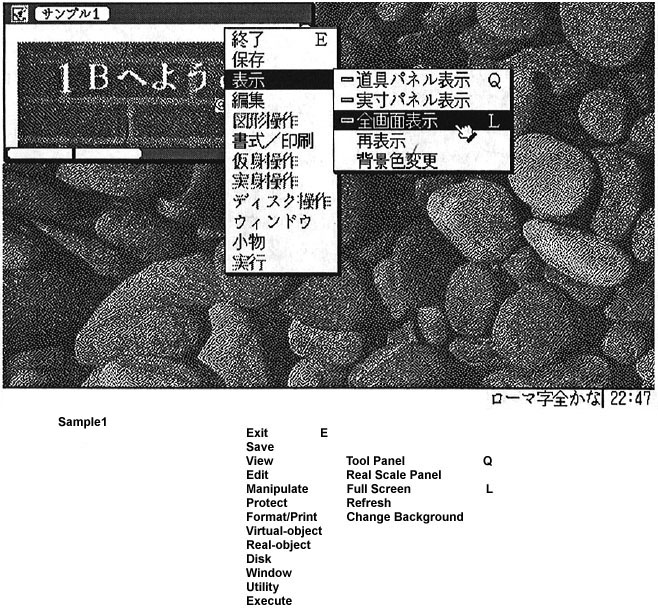
Once the window "Sample1 (Skript)" has attained the appropriate size and location, for the purpose of the correction work hereafter, it is better to open up "Sample1 (Figure)" wide in the manner of the original. At this time, don't make it large by dragging the corner of the window, rather make it large by selecting [Full Screen] under the [View] menu (Fig. 21). Then, before closing "Sample1 (Figure)" hereafter, without fail release full screen display. If you end up closing the window as is without release of full screen display, window "Sample1 (Skript)," which was adjusted with trouble, will end up returning to the original size and location.
 |
|
|
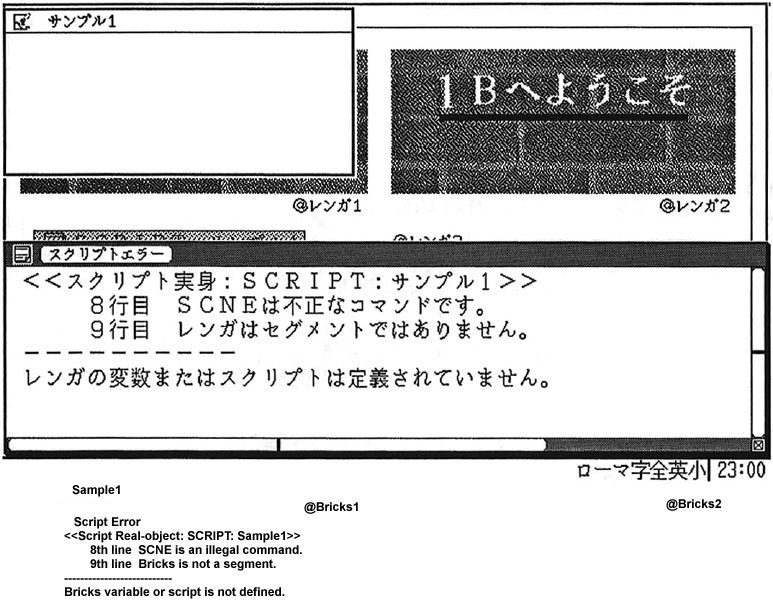
1 Once You've Corrected, Don't Forget to Save
When there is a mistake in a script, a message will appear in another window (Fig. 22). What you want to correct should be window "SCRIPT: Sample1" or window "Sample1 (Figure)." At this time, it will be easy if you directly select from the [Window] menu and bring the necessary window to the forefront. After the corrections are finished, do not forget to select [to the Original Real-object] from the [Save] menu in that window. When you forget this, because the corrections will not be reflected in the real object, they will not become corrected things. It is fairly easy to commit this mistake. When you're troubled and say to yourself, "in spite of the fact that it should be corrected, it doesn't run well," I would like you to confirm one more time as to whether it has been properly saved.
 |
|
|
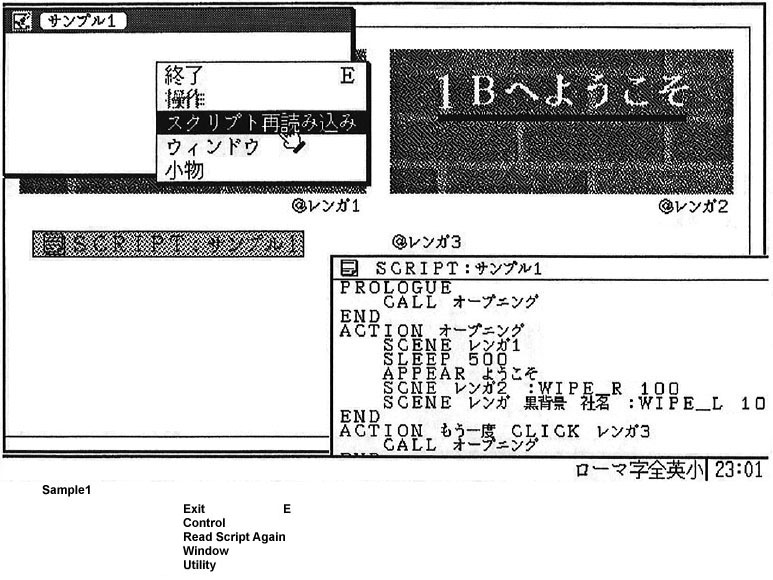
2 Do [Read Script Again]
When the corrections are finished, return to the window "Sample1 (Skript)." Then, select the [Read Script Again] menu (Fig. 23). As the script executes one more time by means of this, you can confirm the corrections.
 |
|
|
Among the statements that we use on this occasion, I would like to give a supplementary explanation concerning the SCENE statement, the ACTION statement, and the MOVE statement. You can omit inside [ ].
SCENE Statement
SCENE [<statement> . . . [:<effect name> <step format>]]
 |
|
|
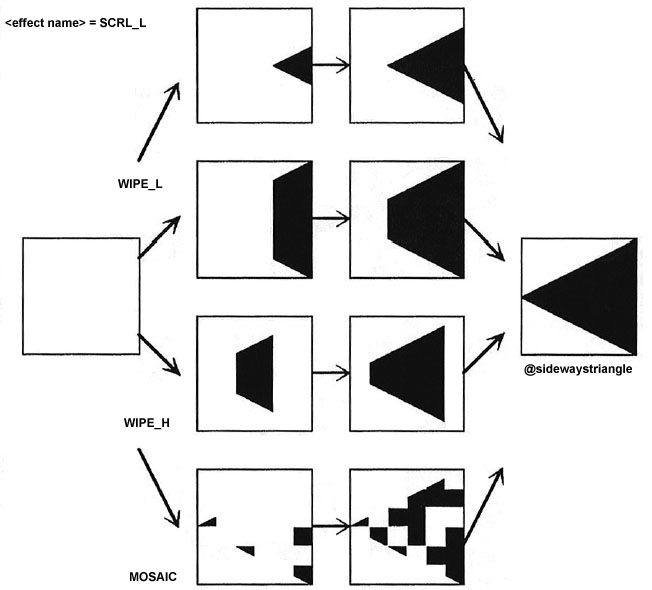
The display effects that can be used with the SCENE statement are as follows below (Fig. 24).
When we collect together the points that differ between the SCENE statement and the MOVE statement, they are as follows:
ACTION Statement
ACTION <procedure name> [<event>]
An <event> is any of the following. In a case where omitted, it becomes the definition of a simple procedure (subroutine).
PRESS <segment name>
When you have pressed <segment name> with the pointing device (PD), you execute this procedure.
CLICK <segment name>
When you have clicked <segment name> with the PD, you execute this procedure.
DCLICK <segment name>
When you have double clicked <segment name> with the PD, you execute this procedure.
QPRESS <segment name>
When you have click pressed <segment name> with the PD, you execute this procedure.
MENU <menu item character string>
This registers <menu item character string> in the [Control] menu. If an item of this menu is selected, it executes this procedure.
In the case where the beginning of a menu item name is @, one character immediately after the @ becomes the key macro character.
Examples: MENU "Operation-1"
- #Registers a menu
- #called Operation-1
MENU "@XOperation-2"
- #Registers a menu
- #called Operation-2,
- #and registers a key
- #macro character
- #called X
You can register up to a maximum of eight items in the [Control] menu.
KEY
If a key is pressed when a window is in a input accept state, it executes this procedure.
MOVE Statement
MOVE <segment> . . . [:<X coordinate> <Y coordinate> [standard segment] [:DUP]]
This moves a segment to a location (<X coordinate>, <Y coordinate>) where the upper left of a <standard segment> has been made (0, 0). The right and lower directions become the directions of increase for the coordinate values.
In a case where a <standard segment> has been omitted, this moves the segment relatively only in proportion to the <X coordinate> and <Y coordinate>.
In a case where a <standard segment> has been made with "@," this moves it to the location of when the upper left corner of the window work area has been made (0, 0).
When coordinate values have been omitted, this moves the specified segment to the location where it first was (the location of the segment that was saved by the figure editor).
In a case where ":DUP" is attached at the end, this makes a copy of a segment and moves it while leaving the segment, which was in a previous location. You use this in a case where you want to leave the segment's track in view.
On this occasion, there is both the fact that this is the first in the series, and that I have tried to explain everything thoroughly including the actual methods of operation. Even with just this, you should be fairly able to realize various types of presentations.
When you try to create a simple presentation, I think you will notice it immediately, but what is important is not the skill to write the scripts, but the ideas that form the basis and the design. The accumulation of detailed studies in which you ask "what would be good to use as a visual effect in order to catch the eye" or "what timing would be good in making those characters appear" give birth to scripts that are fun to operate.
Inside the Personal Media Forum (FPMC) at NIFTY-Serve, a large number of works that use 1B MicroScript appear. In particular, the "Script Magazine" is filled with various techniques that are useful in presentations. By all means, please take a look at them.
____________________
[1] 1B MicroScript: 1B MicroScript is one piece of application software for use with the 1B series. It is sold from Personal Media at a list price of 60,000 yen. Users who have joined SUS can purchase it at a special price of 20,000 yen. SUS (Software Update Service) is a system in which by having the user pay an annual fixed sum version up fee, the latest updated software arrives in his/her hands about twice a year. Refer to page 48 in Vol. 21 of this magazine.
[2] Learning remote control: A learning remote control can learn all sorts of infrared remote control signals. Because it can learn and store various types of signals, you can run various devices from different makers with that one unit, without carrying several remote controls. The learning remote control that 1B MicroScript is compatible with is the "CROSSAM2" (23,800 yen) of HAL Laboratory, Inc. Furthermore, it is necessary to prepare a cable (e.g., Sony Corp.'s SMF-532) to connect the CROSSAM2 with 1B's RS-232C terminal.
[3] VISCA: VISCA (Video System Control Architecture) is a standard Sony Corp. developed for the purpose of connecting video equipment with computers. Through instructions from the personal computer, you can make the video equipment do various types of operations (power ON/OFF, cue, replay, record, etc.), and you can simultaneously control various types of video equipment. All sorts of video editing beginning with dubbing become possible. A LANC terminal and also a Control-S terminal are attached to video equipment compatible with the VISCA standard. It is necessary to connect Sony's "Vbox CI-1000"(33,000 yen) between 1B's RS-232C terminal and the VISCA-compatible device.
[4] A large number of sample programs that have made full use of those functions have been attached to 1B MicroScript.
[5] Execution Function Tag [ Fusen]: BTRON possesses a scheme of the type that enables it to open a single real object (file) with multiple applications. Information necessary in starting up an application are entered into an execution function tag. When we paste this tag in a real object for future use, its name appears in the [Execute] menu. By selecting that, it is possible to start up an application. You can paste two or more execution function tags in a single real object for future use.
Personal computers that possess this type of scheme are rare, and this serves as one of BTRON's features. In a lot of operating environments where a graphical user interface is employed, only one application is assigned to one icon. Opening that icon with another application is not impossible, but ones that provide this as a general function in the manner of BTRON are not to be found. For example, this is offbeat, but a sheet of paper can be used both in writing characters and in wrapping something. We could say that execution function tags provide a scheme that can be used for various purposes, and which is not limited to a single data use.
____________________
[Translator's Note 1] Although this sample program first appeared in Vol. 22 of TRONWARE in 1993, a modified version of it still forms part of the description of MicroScript in the Cho Kanji 4 built-in "Help Guide," and a completed script based on that modified version, which is activated just by double clicking on its virtual object, is inside the Cho Kanji 4 samples collection that appears in the initial window. Here's where it is located.
[Translator's Note 2] According to the description on page 117 of Maikurosukuriputo nyuumon [An Introduction to BTRON MicroScript] published by Personal Media Corporation in 1999, " . . . in the space that lies between words, it is not necessary for more than one space character, or a tab character to be entered." The sample scripts that appear in this book are in the Cho Kanji 4 samples collection that appears in the initial window.
[Translator's Note 3] MicroScript is now in its third version, so a script should begin with "VERSION 3" on the first line. The second line would have "PROLOGUE" on it. There is backward compatibility, so scripts written with previous versions of MicroScript can be executed on the latest version of the Cho Kanji operating system.
[Translator's Note 4] The English-language kit developed for Cho Kanji 4 changes the katakana (sukuriputo), which indicates a file that can be executed by double clicking, to (Skript), because the word "script" is a "reserved word" in the Cho Kanji operating system used with the MicroScript interpreter. German speakers will have no problem dealing with this, since this is how one spells script in German, but English speakers may find it a little strange at first.
The above article on MicroScript appeared on pages 60-71 in Vol. 22 of TRONWARE . It was translated and loaded onto this Web page with the permission of Personal Media Corporation.
Copyright © 1993 Personal Media Corporation
Copyright © 2007 Sakamura Laboratory, University Museum, University of Tokyo